
Product Details
Cool Anime Men Women Face Mask, Washable Adjustable Mouth Cover Dust-Proof Bandana with 4 Filters
Free Shipping+Easy returns

Product Details
Rubie’s Boys DC Comics Deluxe Batman Costume, Small, Multicolor
Free Shipping+Easy returns

Product Details
Kids Washable Face Masks With Adjustable Ear Loops, 4D Cute Designer Mask for Kid
Free Shipping+Easy returns

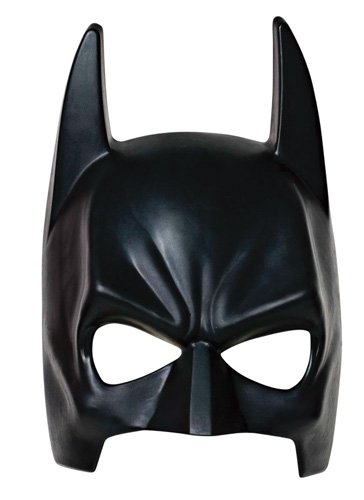
Product Details
Rubie’s Costume Batman Child’s Chinless Vinyl Mask
Free Shipping+Easy returns

Product Details
amscan Game Ready Team Spirit Party Super Hero Mask Accessory, Black, One Size, 2 7/8 inch x 8 1/4 inch
Free Shipping+Easy returns

Product Details
Volcom unisex-adult Volcom Adult Reusable Washable Face Mask
Free Shipping+Easy returns

Product Details
Rubie’s Costume Co Women’s Dc Superheroes Batgirl Mask
Free Shipping+Easy returns
Product Details
Rubie’s Batman Adult Mask
Free Shipping+Easy returns

Product Details
Vera Bradley 3-Pack Double-Layer Cotton Face Mask with Filter Pocket
Free Shipping+Easy returns

Product Details
Hulk mask for Kids,Superhero Costumes Children’s Birthday Parties, Hulk Toys Gifts for Halloween Cosplay Parties
Free Shipping+Easy returns

Product Details
Men Womens Face Mask 3PC with 6 Filter Washable Dust-Proof Face Cover Balaclava Reusable Made in USA
Free Shipping+Easy returns

Product Details
Rubie’s The Dark Knight Rises Batman Child Costume Kit
Free Shipping+Easy returns
Kinderspeletjies

Bam! Pow! Kaboom! There have been a lot of superheroes racing around my house recently, rescuing dolls and dinosaurs in distress and generally causing well intentioned chaos. I’ve been sewing an AWFUL lot of masks in the last month or so, stocking up my Etsy shop and preparing for the C
Sewing

DIY

Our youth group made these masks to add to care packages for the Ronald MacDonald House. The mask is quite simple and you will find yourself making more than one just to give away. Might as well! Below is the pattern. Click on the image below to enlarge to fit on a 8.5 x 11 in sheet and print.
halloween costumes

DIY/Crafts

If you can’t tell, I’m really excited about this last project. I dont have a little boy (yet, due in March \u003c3) so its great to get started on some boy projects. I was out searching for a good Batman mask for a little boy in Lily’s class who’s having his birthday party this weekend. I could not, for the life of me, find a realistic mask. So, after making some winter hats, I opted to use that tutorial with modifications to make it. Got the basic pattern (below) from a lovely blog I found. She did a great job with this tutorial and it was easy to follow using the diagram she made. I followed part one, used a 6 in. piece for part 2, and skipped part 3. Pt. 1 I guessed his head at 18 in. Divided that number by 4 and came up with 4.5 inches for my sections. You cut the slits 3 in. down To make the scalped edges easily I folded each section in half and rounded from the top. See?? Next I cut a wide triangle for Batman’s ears. Cut it in half to get the straight edge and keep them even. Then you sew all of the scalped edges together. It was simple to put the ears on once I gave it thought to how the hat would turn. With 4 sections, you can put the ears on two opposite seams. That way they are on each side of your child’s head. Next I cut a 6 in. strip that was 19 in. I like to make this longer so I don’t end up with a gap, then I can trim extra fabric off the end when I’m done. Sew this to the top of the hat. This is how it should turn out. Next I took a piece of cardboard and drew the shape of the eyes. Using the template to ensure they were the same size, I drew around each eye. The front seam makes it super easy to find the middle of the child’s face. As you can see I creased my fabric a bit to be sure they would be in the right spot. ** Be sure to use a washable pen for mistakes! Mine was tailors chalk but the fabric store should have a few options. I then turned the had sideways creasing it at the front and back where the seams were. It took a few tries to get my face shape right. I didn’t end up cutting the back at all and just stopped at the ear flaps. Then cut out the eyes and face. I chose to sew around it since felt can be stretched and I didn’t want the little boy to end up distorting the eye shape. My daughter tried it on to check the size, and it looked grea
t! The little boys head is a bit bigger than hers, so it seems a tad big in the photo. Could have also made the eyes a little smaller huh? Only thing I have left to do it add some felt strings to hang down. I think it will help him pull it on. Hope you all enjoy it and make something amazing for your children. I will be constructing a utility belt out of felt today and will have to add that later. 🙂 … As promised I’m updating with photos of the finished belt. I didn’t photograph the process like I did with the mask since it wasn’t planned out. Though I can give some help on the construction. Here is my finished belt. It constructed out of felt and velcro. The Belt itself was made by putting 2, 1 1/2 in, pieces of felt together. I sewed around the whole thing then did lines in the middle to make it sturdy. How do you know a general belt size when giving a gift? I used this chart I found HERE. Though I did add another 2 inches for growth. Used a photo of Batman’s logo found HERE. If you scroll down it has the logo in black and white which allowed me to print it without using up a ton of ink. (i didn’t use the one that was solid in the middle). First I cut out the oval. Put it over 2 pieces of black felt and traced it. **I sewed the oval before cutting it so it could move around without distorting. THEN, I cut the symbol out, placed it over my yellow felt and did the same. Trace and cut. (only used one layer. The toys I found at a retail store for cheap. Nerf guns seemed like a good idea since they wouldn’t cause any harm. Plus, they were super small which is what I needed. I used sticky backed velcro for the gun and sewed a long strip of velcro onto the belt to accommodate it. **I wouldn’t recommend that you sew the sticky backed velcro on the belt, it gums up your needle and for me just doesn’t EVER go well. I used regular stuff for the belt. Also included a flashlight for those dark nights when he’s fighting crime. Found for a dollar! My first experience with double sided interfacing was horrible. Not to discourage anyone from using it, because in the end I should have tried to use it on this buckle. I just got lazy :/ Therefore, its not on straight. note to self: don’t try to skip steps.
Cute Ideas

Bam! Pow! Kaboom! There have been a lot of superheroes racing around my house recently, rescuing dolls and dinosaurs in distress and generally causing well intentioned chaos. I’ve been sewing an AWFUL lot of masks in the last month or so, stocking up my Etsy shop and preparing for the C
Boy Stuff

Bam! Pow! Kaboom! There have been a lot of superheroes racing around my house recently, rescuing dolls and dinosaurs in distress and generally causing well intentioned chaos. I’ve been sewing an AWFUL lot of masks in the last month or so, stocking up my Etsy shop and preparing for the C